Kimi K2.7 Code is now on CometAPI — Kimi's most intelligent coding model to date, reliably follows instructions in long contexts and completes programming tasks with a higher success rate. Try it now
模型
定價
企業
資源
整合
快速開始
CometAPI vs. 競爭對手
比較
支援
部落格
English
繁體中文
日本語
한국어
Français
Deutsch
Español
Italiano
Português
Русский
العربية
ไทย
Tiếng Việt
Bahasa Indonesia
Bahasa Melayu
Türkçe
Polski
Nederlands
Danish
Norsk
Қазақ
اردو
免費開始
免費開始
GLM 4.7 部落格
GLM 4.7 部落格
Mar 19, 2026
GLM-5
GLM 4.7
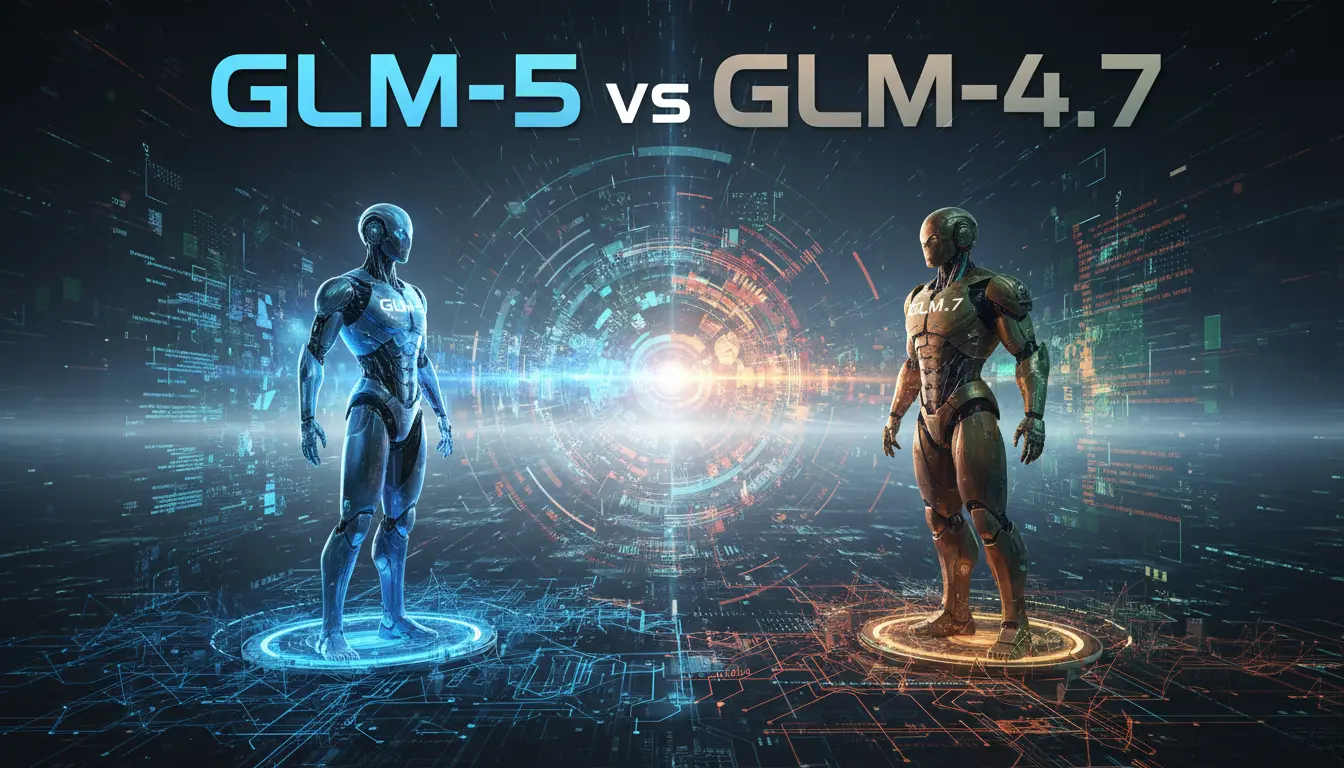
GLM-5 與 GLM-4.7:有哪些改變、重點是什麼,以及是否應該升級?
GLM-5,由 Zhipu AI (Z.ai) 於 2026 年 2 月 11 日發佈,相較於 GLM-4.7 在架構上有重大躍進:更大的 MoE 規模(≈744B vs ~355B 總參數量)、更高的活躍參數容量、更低的實測幻覺率,並在 agentic 與編碼基準測試上取得明顯提升—但以推理複雜度和(有時)延遲為代價。
Mar 19, 2026
GLM 4.7
GLM 4.7
以下以「GLM-4-7B-Flash」(常見記法為 GLM-4-7B-Flash,您寫的 GLM-4.7-Flash 多半指此型號)為例,說明本機離線使用的常見方式。請先在 Hugging Face 或 ModelScope 找到對應的模型倉庫並接受授權,後續將 <model-id> 替換為實際倉庫名;GLM 系列通常需要 trust_remote_code。 一、環境與依賴 - 建議:Python 3.10+,CUDA 11.8+/12.x(若用 NVIDIA GPU),PyTorch 對應版本 - 可選加速:flash-attn(需符合 GPU 架構與 CUDA 版本) - 安裝基本依賴 pip install --upgrade torch torchvision torchaudio --index-url https://download.pytorch.org/whl/cu118 pip install --upgrade transformers accelerate sentencepiece safetensors pip install --upgrade bitsandbytes # 如需4-bit量化推理 pip install flash-attn --no-build-isolation # 可選(GPU 支援時) 二、使用 Transformers 直接推理 - 半精度/自動分配到 GPU from transformers import AutoTokenizer, AutoModelForCausalLM import torch model_id = "<model-id>" # 例如:THUDM/glm-4-7b-flash(請以實際倉庫名為準) tokenizer = AutoTokenizer.from_pretrained(model_id, trust_remote_code=True) model = AutoModelForCausalLM.from_pretrained( model_id, torch_dtype=torch.bfloat16, # 或 torch.float16(依 GPU 支援) device_map="auto", trust_remote_code=True ).eval() # 若模型提供 chat 介面(GLM 常見) response, history = model.chat(tokenizer, "你好,給我一段 GLM 本機使用的示例。", history=[]) print(response) # 或使用 chat template(通用方式) messages = [ {"role": "system", "content": "You are a helpful assistant."}, {"role": "user", "content": "介紹一下 GLM-4-7B-Flash 的本機部署方法。"} ] input_ids = tokenizer.apply_chat_template(messages, add_generation_prompt=True, return_tensors="pt").to(model.device) with torch.no_grad(): outputs = model.generate( input_ids, max_new_tokens=512, temperature=0.7, top_p=0.9 ) print(tokenizer.decode(outputs[0], skip_special_tokens=True)) - 4-bit 量化(降低顯存佔用) from transformers import AutoTokenizer, AutoModelForCausalLM, BitsAndBytesConfig quant_cfg = BitsAndBytesConfig( load_in_4bit=True, bnb_4bit_use_double_quant=True, bnb_4bit_quant_type="nf4", bnb_4bit_compute_dtype="bfloat16" ) tokenizer = AutoTokenizer.from_pretrained(model_id, trust_remote_code=True) model = AutoModelForCausalLM.from_pretrained( model_id, quantization_config=quant_cfg, device_map="auto", trust_remote_code=True ).eval() - Apple Silicon(MPS)簡述 import torch device = torch.device("mps") if torch.backends.mps.is_available() else torch.device("cpu") # 直接 .to(device) 或 device_map="auto" 由 PyTorch 分配(性能不及 CUDA,僅作輕量測試) 三、用 vLLM 跑本地 OpenAI 相容服務 - 安裝與啟動 pip install "vllm>=0.5.0" python -m vllm.entrypoints.openai.api_server --model <model-id> --trust-remote-code --max-model-len 4096 --dtype auto - 調用(curl) curl http://127.0.0.1:8000/v1/chat/completions \ -H "Content-Type: application/json" \ -d '{ "model": "<model-id>", "messages": [{"role":"user","content":"用要點說明如何本機使用 GLM-4-7B-Flash"}], "temperature": 0.7 }' - 調用(Python,openai 相容) pip install openai from openai import OpenAI client = OpenAI(base_url="http://127.0.0.1:8000/v1", api_key="EMPTY") resp = client.chat.completions.create( model="<model-id>", messages=[{"role":"user","content":"請示範本機推理指令"}], temperature=0.7 ) print(resp.choices[0].message.content) 四、常見注意事項 - 模型倉庫與授權:到 Hugging Face 或 ModelScope 搜尋「GLM-4-7B-Flash」或相近名稱,閱讀說明並接受授權。不同倉庫可能提供原始、量化(如 GPTQ/AWQ/INT4)或「Flash/Long」等變體。 - trust_remote_code:GLM 系列常需設為 True 以載入自定義模型邏輯與 chat 介面。 - 顯存需求(粗略參考):7B FP16/BF16 約需 12–16GB;4-bit 量化約 6–8GB。實際取決於序列長度與張量並行策略。 - 加速:若安裝並啟用 flash-attn,需確保 CUDA/驅動/GPU 架構相容;否則請移除或改用預設注意力實作。 - 長文本與上下文:若為「Flash」或「Long」變體,請依倉庫說明設置 max_position_embeddings 或相應啟動參數(如 vLLM 的 --max-model-len)。 - Windows 使用者:建議 CUDA + WSL2 或原生 CUDA 環境;bitsandbytes 在某些 Windows/CUDA 組合上需額外配置。 五、快速故障排查 - ImportError/ModuleNotFoundError:升級 transformers、accelerate、safetensors;確認 trust_remote_code=True。 - CUDA OOM:嘗試 4-bit 量化、減小 batch/序列長度、關閉梯度計算(eval、no_grad)、或使用 vLLM+paged attention。 - 推理很慢:確認是否在 CPU 上;如可用,安裝 flash-attn;調整 max_new_tokens、temperature/top_p;或改用量化權重。 如您提供具體的模型倉庫名稱(<model-id>)與硬體環境(GPU/顯存/作業系統),可進一步給出精確的安裝與啟動指令。
GLM-4.7-Flash 是 GLM-4.7 系列中輕量且高效能的 30B A3B MoE 成員,旨在實現面向程式設計、Agentic 工作流程與通用推理的本地與低成本部署。你可以在本地以三種實用方式運行它:(1) 經由 Ollama(簡單、受管理的本地執行時環境),(2) 經由 Hugging Face / Transformers / vLLM / SGLang(以 GPU 優先的伺服器部署),或 (3) 經由 GGUF + llama.cpp / llama-cpp-python(適合 CPU/邊緣環境)。
Mar 30, 2026
GLM 4.7
GLM-4.7 發布:這對人工智慧意味著什麼?
2025 年 12 月 22 日,Zhipu AI(Z.ai)正式發佈 GLM-4.7,作為其通用語言模型(GLM)家族的最新迭代版本,並在開源 AI 模型領域引發全球關注。該模型不僅在程式設計與推理任務方面取得進一步提升,還在關鍵基準測試中對 GPT-5.2 與 Claude Sonnet 4.5 等專有模型的主導地位構成挑戰。
![以下以「GLM-4-7B-Flash」(常見記法為 GLM-4-7B-Flash,您寫的 GLM-4.7-Flash 多半指此型號)為例,說明本機離線使用的常見方式。請先在 Hugging Face 或 ModelScope 找到對應的模型倉庫並接受授權,後續將 <model-id> 替換為實際倉庫名;GLM 系列通常需要 trust_remote_code。
一、環境與依賴
- 建議:Python 3.10+,CUDA 11.8+/12.x(若用 NVIDIA GPU),PyTorch 對應版本
- 可選加速:flash-attn(需符合 GPU 架構與 CUDA 版本)
- 安裝基本依賴
pip install --upgrade torch torchvision torchaudio --index-url https://download.pytorch.org/whl/cu118
pip install --upgrade transformers accelerate sentencepiece safetensors
pip install --upgrade bitsandbytes # 如需4-bit量化推理
pip install flash-attn --no-build-isolation # 可選(GPU 支援時)
二、使用 Transformers 直接推理
- 半精度/自動分配到 GPU
from transformers import AutoTokenizer, AutoModelForCausalLM
import torch
model_id = "<model-id>" # 例如:THUDM/glm-4-7b-flash(請以實際倉庫名為準)
tokenizer = AutoTokenizer.from_pretrained(model_id, trust_remote_code=True)
model = AutoModelForCausalLM.from_pretrained(
model_id,
torch_dtype=torch.bfloat16, # 或 torch.float16(依 GPU 支援)
device_map="auto",
trust_remote_code=True
).eval()
# 若模型提供 chat 介面(GLM 常見)
response, history = model.chat(tokenizer, "你好,給我一段 GLM 本機使用的示例。", history=[])
print(response)
# 或使用 chat template(通用方式)
messages = [
{"role": "system", "content": "You are a helpful assistant."},
{"role": "user", "content": "介紹一下 GLM-4-7B-Flash 的本機部署方法。"}
]
input_ids = tokenizer.apply_chat_template(messages, add_generation_prompt=True, return_tensors="pt").to(model.device)
with torch.no_grad():
outputs = model.generate(
input_ids,
max_new_tokens=512,
temperature=0.7,
top_p=0.9
)
print(tokenizer.decode(outputs[0], skip_special_tokens=True))
- 4-bit 量化(降低顯存佔用)
from transformers import AutoTokenizer, AutoModelForCausalLM, BitsAndBytesConfig
quant_cfg = BitsAndBytesConfig(
load_in_4bit=True,
bnb_4bit_use_double_quant=True,
bnb_4bit_quant_type="nf4",
bnb_4bit_compute_dtype="bfloat16"
)
tokenizer = AutoTokenizer.from_pretrained(model_id, trust_remote_code=True)
model = AutoModelForCausalLM.from_pretrained(
model_id,
quantization_config=quant_cfg,
device_map="auto",
trust_remote_code=True
).eval()
- Apple Silicon(MPS)簡述
import torch
device = torch.device("mps") if torch.backends.mps.is_available() else torch.device("cpu")
# 直接 .to(device) 或 device_map="auto" 由 PyTorch 分配(性能不及 CUDA,僅作輕量測試)
三、用 vLLM 跑本地 OpenAI 相容服務
- 安裝與啟動
pip install "vllm>=0.5.0"
python -m vllm.entrypoints.openai.api_server --model <model-id> --trust-remote-code --max-model-len 4096 --dtype auto
- 調用(curl)
curl http://127.0.0.1:8000/v1/chat/completions \
-H "Content-Type: application/json" \
-d '{
"model": "<model-id>",
"messages": [{"role":"user","content":"用要點說明如何本機使用 GLM-4-7B-Flash"}],
"temperature": 0.7
}'
- 調用(Python,openai 相容)
pip install openai
from openai import OpenAI
client = OpenAI(base_url="http://127.0.0.1:8000/v1", api_key="EMPTY")
resp = client.chat.completions.create(
model="<model-id>",
messages=[{"role":"user","content":"請示範本機推理指令"}],
temperature=0.7
)
print(resp.choices[0].message.content)
四、常見注意事項
- 模型倉庫與授權:到 Hugging Face 或 ModelScope 搜尋「GLM-4-7B-Flash」或相近名稱,閱讀說明並接受授權。不同倉庫可能提供原始、量化(如 GPTQ/AWQ/INT4)或「Flash/Long」等變體。
- trust_remote_code:GLM 系列常需設為 True 以載入自定義模型邏輯與 chat 介面。
- 顯存需求(粗略參考):7B FP16/BF16 約需 12–16GB;4-bit 量化約 6–8GB。實際取決於序列長度與張量並行策略。
- 加速:若安裝並啟用 flash-attn,需確保 CUDA/驅動/GPU 架構相容;否則請移除或改用預設注意力實作。
- 長文本與上下文:若為「Flash」或「Long」變體,請依倉庫說明設置 max_position_embeddings 或相應啟動參數(如 vLLM 的 --max-model-len)。
- Windows 使用者:建議 CUDA + WSL2 或原生 CUDA 環境;bitsandbytes 在某些 Windows/CUDA 組合上需額外配置。
五、快速故障排查
- ImportError/ModuleNotFoundError:升級 transformers、accelerate、safetensors;確認 trust_remote_code=True。
- CUDA OOM:嘗試 4-bit 量化、減小 batch/序列長度、關閉梯度計算(eval、no_grad)、或使用 vLLM+paged attention。
- 推理很慢:確認是否在 CPU 上;如可用,安裝 flash-attn;調整 max_new_tokens、temperature/top_p;或改用量化權重。
如您提供具體的模型倉庫名稱(<model-id>)與硬體環境(GPU/顯存/作業系統),可進一步給出精確的安裝與啟動指令。](https://resource.cometapi.com/How to Use GLM-4.7-Flash Locally.webp)
