GPT Image 2.6 API in CometAPI gives developers a practical route to image generation and editing with two variants: Sunburst and Flare.
Build image assets with Python and a CometAPI key: start with a raster request, then add SVG output, reference images, or a transparent PNG annotation layer when your route supports them. The examples use Python 3.10 or later and keep the API key on your server.
The distinction that matters most: a transparent PNG output is a finished asset; a transparent PNG markup file is an input that tells the model where to edit.
Key Takeaways
Use GPT Image 2.6 Flare for quick drafts and Sunburst for detailed revisions.
Send generation requests and edit requests to their respective Image API endpoints.
Reviewed for clarity, source attribution and current API terminology.
Use SVG for vector assets and transparent PNG for raster cutouts.
Keep markup separate from the source image and match their oriented dimensions.
Confirm route support before enabling advanced fields in your application.
What Is the GPT Image 2.6 API?
OpenAI introduced GPT Image 2.6 on November 4, 2026. The model family accepts text and image inputs for visual creation and revision.
The two variants share a workflow-oriented role, but their priorities differ.
What Parameters Does the GPT Image 2.6 API Support?
Start with a small, explicit configuration.
For edits, the request also supplies source images. The image-edit schema supports up to 16 reference images.
Leave complexity at its default for the first generation. For a targeted edit such as recoloring one object, start with low and check that surrounding details remain intact.
How Do You Use GPT Image 2.6 API with CometAPI?
Follow the CometAPI setup guide to create a key, then store it in the environment variable below. You will also need local PNG source files for the editing examples.
The examples use Python requests to show the JSON and multipart request bodies directly.
These examples use OpenAI’s Image API request format through CometAPI. Before running them, confirm that your selected CometAPI route supports the model and fields used in the example.
Install the dependencies
pip install requests pillow
Set the key in your shell:
export COMETAPI_KEY="YOUR_COMETAPI_KEY"
PowerShell users can use:
$env:COMETAPI_KEY = "YOUR_COMETAPI_KEY"
Create shared request helpers
Save the shared helpers as image_workflows.py. Put each workflow example in a separate script and import the helpers it uses. Run only the workflow you want to test.
This helper raises an error for an unsuccessful HTTP response or invalid base64 data. It expects data[0].b64_json; if your route returns a different structure, inspect that response before changing the save function.
Keep the returned usage record alongside the output. If a request times out, inspect its status or billing record before resubmitting: a timeout does not establish that generation failed.
Generate a first image
Run this call after the shared helpers to generate a single product image and save it as cup.png.
For the later editing examples, make a copy of cup.png named product.png in the same working directory. Keep cup.png unchanged as your original. You can instead use your own product photograph, saved as product.png.
Prepare setting.png separately: use a PNG photograph of the background or setting where you want the cup to appear, with enough clear space for the product. Use an image you have permission to upload. Save it beside product.png; the multi-reference request uses it for the setting, not as a second product reference.
generate(
    prompt=(
        "Create a studio product photograph of an unbranded teal "
        "ceramic travel cup on a warm cream background. "
        "Show one cup, a clean silhouette, and a soft contact shadow. "
        "No text or decorative objects."
    ),
    destination="cup.png",
    output_format="png",
)
Check the result against a short acceptance checklist: one cup, correct color, clean silhouette, and no extra objects.
How Do You Generate SVG with GPT Image 2.6?
Use SVG output for editable vector assets. Request it through the generation endpoint with n=1, then decode the response into an .svg file. SVG output does not support streaming.
generate(
    prompt=(
        "Design an original minimalist icon of a teal travel cup "
        "with a small leaf motif. Use simple closed vector shapes, "
        "two flat colors, and generous negative space. "
        "No text, gradients, photographs, or background scenery."
    ),
    destination="cup-icon.svg",
    output_format="svg",
)
A useful SVG acceptance test goes beyond opening the file:
Inspect the icon at small and large sizes.
Check whether shapes and colors are easy to edit.
Confirm that the result fits the intended visual system.
Check the XML before embedding externally supplied SVG in an application.
Do not send an SVG back as a raster editing input. Keep vector revision and image-editing workflows separate.
How Do You Create Transparent PNG Assets with GPT Image 2.6?
For a cutout, request PNG output and a transparent background. The official transparent-logo example also emphasizes clean alpha edges and the absence of a painted checkerboard.
generate(
    prompt=(
        "Create a single teal ceramic travel cup as an isolated "
        "e-commerce asset. Center the entire cup with generous padding. "
        "Keep clean edges and a fully transparent background. "
        "No floor, backdrop, checkerboard pattern, or text."
    ),
    destination="cup-transparent.png",
    output_format="png",
    background="transparent",
)
Validate actual transparency:
from PIL import Image

with Image.open("cup-transparent.png") as image:
    alpha = image.convert("RGBA").getchannel("A")
    minimum, maximum = alpha.getextrema()

    if minimum == 255:
        raise RuntimeError("The output contains no transparent pixels.")

    if maximum == 0:
        raise RuntimeError("The output is entirely transparent.")

    print("The output contains visible content and transparency.")
This catches an opaque image masquerading as a cutout. It does not assess edge quality; inspect the asset against both light and dark backgrounds.
How Do You Edit Images with Multiple GPT Image 2.6 References?
Give each reference a specific role. In this example, the first image supplies the product identity and the second supplies the desired setting.
with (
    open("product.png", "rb") as product,
    open("setting.png", "rb") as setting,
):
    response = requests.post(
        f"{BASE_URL}/images/edits",
        headers=HEADERS,
        data={
            "model": "gpt-image-2.6-sunburst",
            "prompt": (
                "Use the cup in the first image as the exact product "
                "reference. Use the second image only for the setting. "
                "Place the cup naturally in that setting. Preserve its "
                "silhouette, lid, color, and printed details. "
                "Do not copy other products from the second image."
            ),
            "quality": "high",
            "complexity": "medium",
            "output_format": "png",
        },
        files=[
            ("image[]", ("product.png", product, "image/png")),
            ("image[]", ("setting.png", setting, "image/png")),
        ],
        timeout=(15, 300),
    )

save_result(response, "product-in-setting.png")
The multipart example uses image[]. JSON edit requests use an images array; do not mix the two encodings.
For repeatable testing, keep reference order fixed. Compare the original product with the output at full resolution, especially handles, labels, edges, and reflections.
How Does Transparent PNG Markup Work in GPT Image 2.6?
Markup is an annotation layer. Draw a circle or other visual instruction on a separate transparent PNG, then send that file with the original image.
The markup workflow applies annotations to the first input image. The overlay must match its oriented dimensions, contain transparent pixels, and remain separate from the original. Do not combine markup with mask or prompt_rewriter.
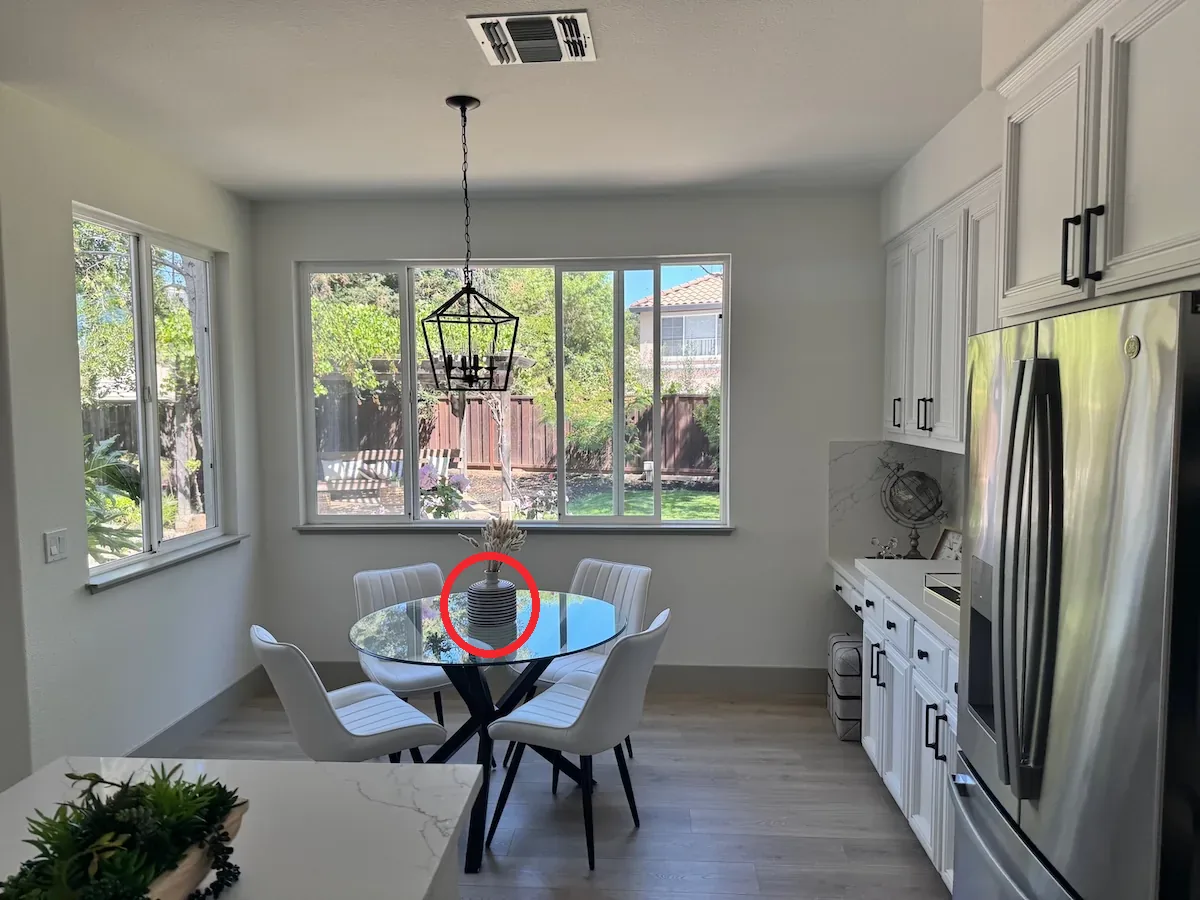
OpenAI’s demonstration shows a marked vase:
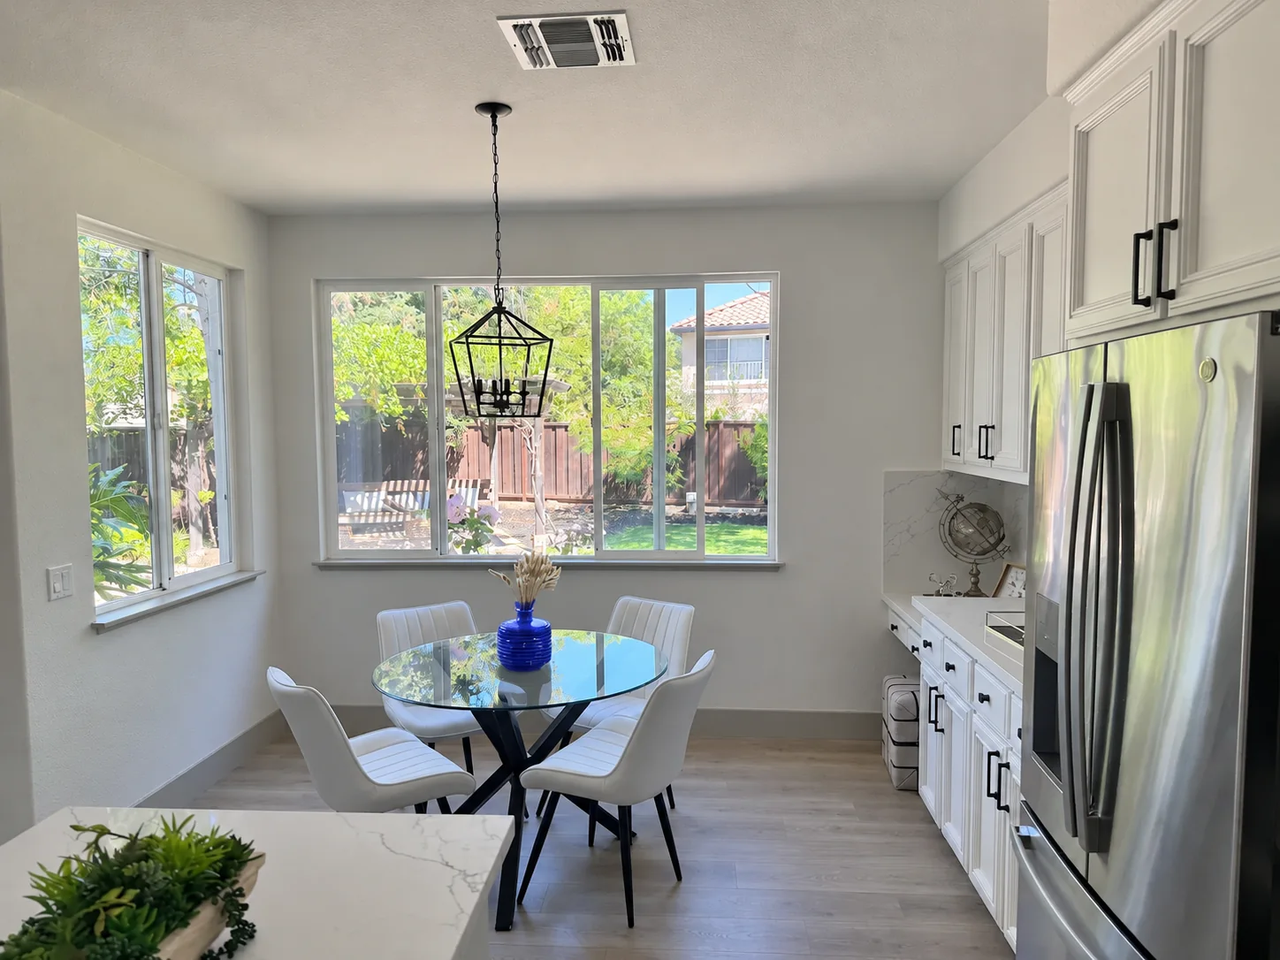
The resulting edit changes the vase:
These are official demonstration images, not outputs from the code below.
Prepare an annotation layer
The bounding box below defines the annotation ellipse. Adjust its coordinates to surround the object you want to edit, then inspect the overlay before submitting it.
with (
    open("product-oriented.png", "rb") as source,
    open("markup.png", "rb") as markup,
):
    response = requests.post(
        f"{BASE_URL}/images/edits",
        headers=HEADERS,
        data={
            "model": MODEL,
            "prompt": (
                "Change the body of the cup inside the red circle "
                "to matte cobalt blue. Preserve the lid, shape, "
                "lighting, and surrounding scene. "
                "Remove the annotation from the finished image."
            ),
            "quality": "medium",
            "complexity": "low",
            "output_format": "png",
        },
        files={
            "image": ("product.png", source, "image/png"),
            "markup": ("markup.png", markup, "image/png"),
        },
        timeout=(15, 300),
    )

save_result(response, "cup-edited.png")
The important design choice is to specify both the requested change and the details to preserve. An annotation identifies the target; the text defines the operation.
GPT Image 2.6 API Pricing: Token Rates and SVG Costs
Both variants have the following published OpenAI token rates.
These are OpenAI rates, not a verified CometAPI quotation.
For an uncached request, the corresponding calculation is:
For example, a raster request using 1,000 text input tokens, no image input tokens, and 2,000 image output tokens would cost $0.065.
For GPT Image 2.6 API in CometAPI, use the price shown for your selected route and review the charge recorded for your request. The OpenAI rates above are a reference calculation, not a CometAPI quote.
A useful business metric is:
Cost per accepted asset =
total workflow spending ÷ number of approved assets
Include rejected generations and revision rounds in the numerator.
How Do You Migrate an Existing Image Workflow to GPT Image 2.6?
If you already use GPT Image 2.5, update the model identifier first and keep the endpoint and response handling explicit. Add optional output formats only after a basic request succeeds.
Set model="gpt-image-2.6-flare" or model="gpt-image-2.6-sunburst" instead of relying on a default model. Keep your existing input files and prompt while checking the first response.
For SVG, use the generation endpoint, save the decoded bytes with an .svg extension, and omit streaming. For raster edits, keep the source images in the edit request. Add markup only after preparing a separate transparent overlay.
Update your file-serving layer as well: an SVG asset and a PNG asset need different media types. PKeep the original source and approved revisions. Start each new edit from the version that contains the changes you want to preserve.
Conclusion
Start with the product-image example, then choose the workflow that matches your output: SVG for editable vector artwork, transparent PNG for cutouts, image references for combining visual inputs, or markup for targeted changes. Compare Flare and Sunburst using the same prompts and settings, and track cost per accepted asset.
FAQ
How should I handle a GPT Image 2.6 request timeout?
A timeout may occur while the server is still processing the request. Save the request ID and check the provider’s request log before retrying to avoid duplicate work and charges.
Why does my application fail to save the returned image?
The helper expects a JSON response containing data[0].b64_json. First check the HTTP status and the response structure. If your route returns an image URL instead, implement the documented URL-download flow rather than passing that URL to a base64 decoder. Keep the saved extension consistent with the requested format.
How can I keep edit files from being overwritten?
Save the source, overlay, and each output under separate names. For example, use product-source.png, product-markup.png, and product-edit-01.png. Store the prompt beside the output. This lets you revisit one revision without losing the original or accidentally uploading an annotated preview as the source.
What should I check before embedding a generated SVG?
Open the asset in your target renderer and inspect its XML with your normal SVG validation tools. Check dimensions, clipping, paths, and any text before publishing. Apply your application’s SVG sanitization policy, serve it with the correct media type, and verify that it remains legible at the smallest size used in your interface.
Specification
Sunburst
Flare
API identifier
gpt-image-2.6-sunburst
gpt-image-2.6-flare
Primary focus
Detailed visual work
Fast iteration
Input modalities
Text and images
Text and images
Output modality
Images
Images
Practical starting point
Final assets and careful revisions
Drafts and interactive editing
Audio support
No
No
Parameter
Generation request
Practical use
model
Explicit variant identifier
Keep model selection reproducible
prompt
Text instructions
Describe the asset and constraints
quality
Start with low, medium, or high
Adjust rendering quality
complexity
low, medium, or high
Adjust planning effort
size
For example, 1024x1024
Fix dimensions for comparisons
n
Use 1 initially
Simplify testing and cost review
output_format
PNG, JPEG, WebP, SVG, or GIF, subject to endpoint support
Match the downstream asset
background
auto, opaque, or transparent
Control raster background behavior
Token category
Sunburst rate per 1M tokens
Flare rate per 1M tokens
Text input
$5.00
$5.00
Cached text input
$1.25
$1.25
Image input
$8.00
$8.00
Cached image input
$2.00
$2.00
Image output
$30.00
$30.00
How to Use GPT Image 2.6 API: SVG Generation and Image Editing - CometAPI