
TL;DR
Use Omni when a project depends on combining reusable people, products, settings, voices, or source video in one controlled workflow. Its value is reference orchestration and audiovisual continuity, not an automatic quality win over the standard model. Begin with one short validation shot, approve the references, add audio, and expand to a storyboard only after the core asset remains stable.
Key Takeaways
- Omni supports text, image, element, video, and voice references, with model-level output up to 15 seconds in supported workflows.
- Kling VIDEO 3.0 remains competitive in preference benchmarks; choose Kling VIDEO 3.0 Omni when its broader reference workflow solves a specific production need.
- Validate identity, product shape, composition, and audio separately before combining them in a multi-shot sequence.
- For API work, follow the parameters documented for the selected provider route rather than assuming every interface feature is exposed.
- Budget against accepted clips, not only the advertised cost of one attempt.
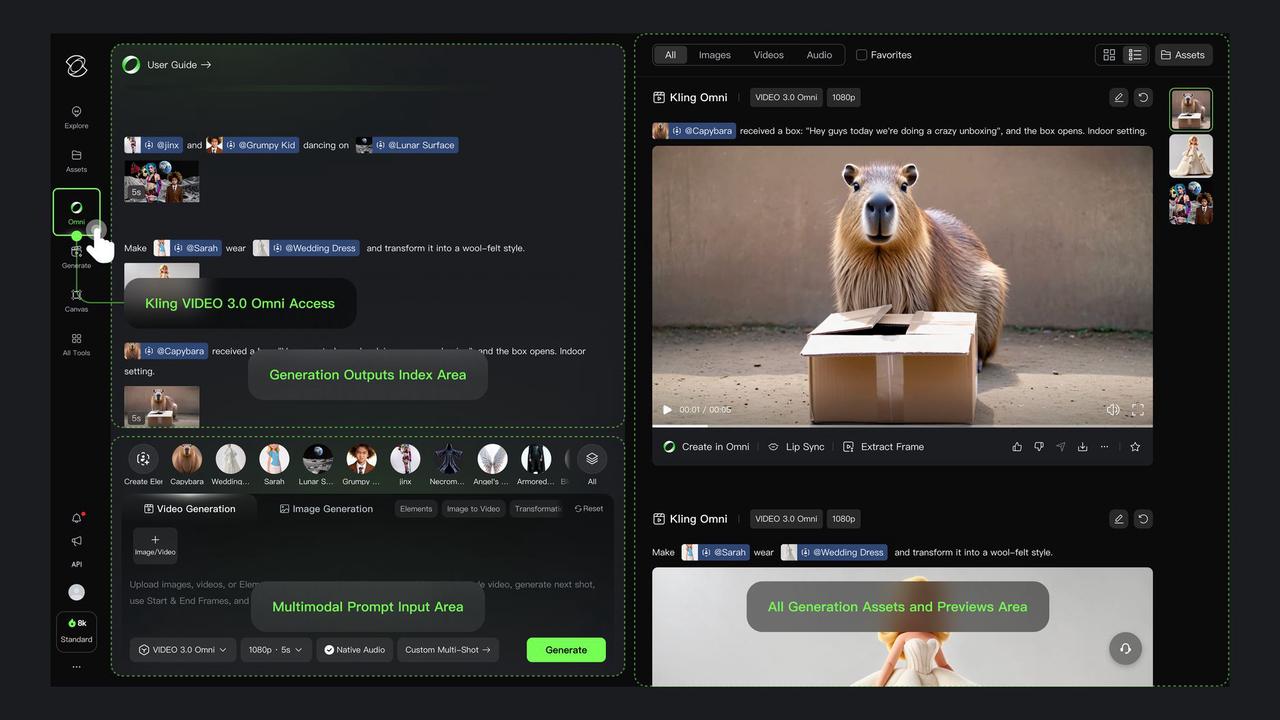
Official Omni workspace and reference controls.
What Does the Omni Model Support?
Kling positions Omni around multimodal references and audiovisual consistency. The practical implication is simple: define the assets that must remain recognizable, then describe what should happen to them.
| Specification — official generation guide | Omni capability |
|---|---|
| Input options | Text, images, video references, reusable elements, and voice references |
| Model-level output duration | 3–15 seconds |
| Video resolution | 720p and 1080p; native 4K in supported workflows |
| Audio | Native audiovisual generation with supported character–voice binding |
| Shot control | Single-shot generation and custom multi-shot sequencing |
| Multi-image element creation | 2–4 images |
| Video-based character creation | A 3–8-second character clip |
| Recommended voice sample | 5–30 seconds of clear, single-speaker speech |
| Combined image and element budget | Up to 7 without video input; up to 4 with video input |
Creating an element is different from attaching references to one generation request. Several views can belong to one reusable element; they are not automatically counted as several independent element slots.
Model-level capability does not guarantee identical controls across providers. A 15-second workflow in Kling’s interface and a third-party API request may expose different parameters and duration values.
Kling VIDEO 3.0 Omni vs Kling VIDEO 3.0: When to Choose Each
The choice is not simply basic video versus video with sound. The standard model also supports native audio, multi-shot generation, and element binding. The more useful distinction is how a project organizes and reuses references.
| Dimension | Kling VIDEO 3.0 | Kling VIDEO 3.0 Omni |
|---|---|---|
| Reference organization | Element binding around an approved start frame or start/end frames | Broader composition with images, elements, and video references |
| Element relationship | Best when the important subjects already exist in the defining frame | Best when separate assets must be combined or reused |
| Character voice | Can use voice-bound elements | Supports visual and voice references in one Omni workflow |
| Multi-shot generation | Supported | Supported with custom storyboard controls |
| Recommended starting point | One approved keyframe that already defines the scene | A collection of assets that must remain recognizable across shots |
Comparison result: start with the standard workflow when one approved frame already contains the essential information. Choose Omni when reference composition, asset reuse, or cross-shot audiovisual continuity is central to the job.
Kling VIDEO 3.0 Omni vs Kling VIDEO 3.0: Benchmarks
The following point estimates compare the 1080p Pro, audio-enabled entries available in Artificial Analysis when this guide was reviewed on September 9, 2026. Values after “±” are published 95% confidence intervals.
| Evaluation — text-to-video / image-to-video | Standard | Omni |
|---|---|---|
| Text-to-video Elo | 1108 ± 5 | 1090 ± 6 |
| Image-to-video Elo | 1072 ± 6 | 1060 ± 7 |
These are preference-based ratings, not generation-success percentages. The standard model has the higher point estimate in both comparisons, while the image-to-video confidence intervals overlap. Scores can change as new evaluations arrive.
Benchmark result: Omni’s advantage should be evaluated through reference handling and production continuity, not inferred from its name or treated as a universal quality ranking.
How to Build Your First Reference-Led Video
Imagine a vertical advertisement featuring a presenter named Maya, a reusable blue bottle, and one approved studio setting. These are illustrative production assets, not a reported generation test.
Prepare a Small, Consistent Asset Set
| Asset | Preparation | Acceptance criterion |
|---|---|---|
| Presenter | Clear views with consistent hair, clothing, and lighting | Recognizable face and unchanged wardrobe |
| Bottle | Front, side, and three-quarter views | Stable body shape, cap, color, and label |
| Setting | One approved studio reference | Consistent background and lighting direction |
| Voice | Clean speech from an authorized speaker | Recognizable voice without competing speech |
Use only faces, recordings, and brand assets that you are authorized to use. Conflicting references should be corrected before you try to compensate with a longer prompt.
Create and Name Your Elements
In Kling’s Element Library, create reusable assets instead of re-describing the same subject for every shot. The official workflow supports multi-image and video-based character creation.
Use descriptive names such as Maya, BlueBottle, and Studio. Names are organizational aids; selecting the saved element is what attaches the reference. For uploaded voices, use clear, single-speaker audio without music or overlapping voices.
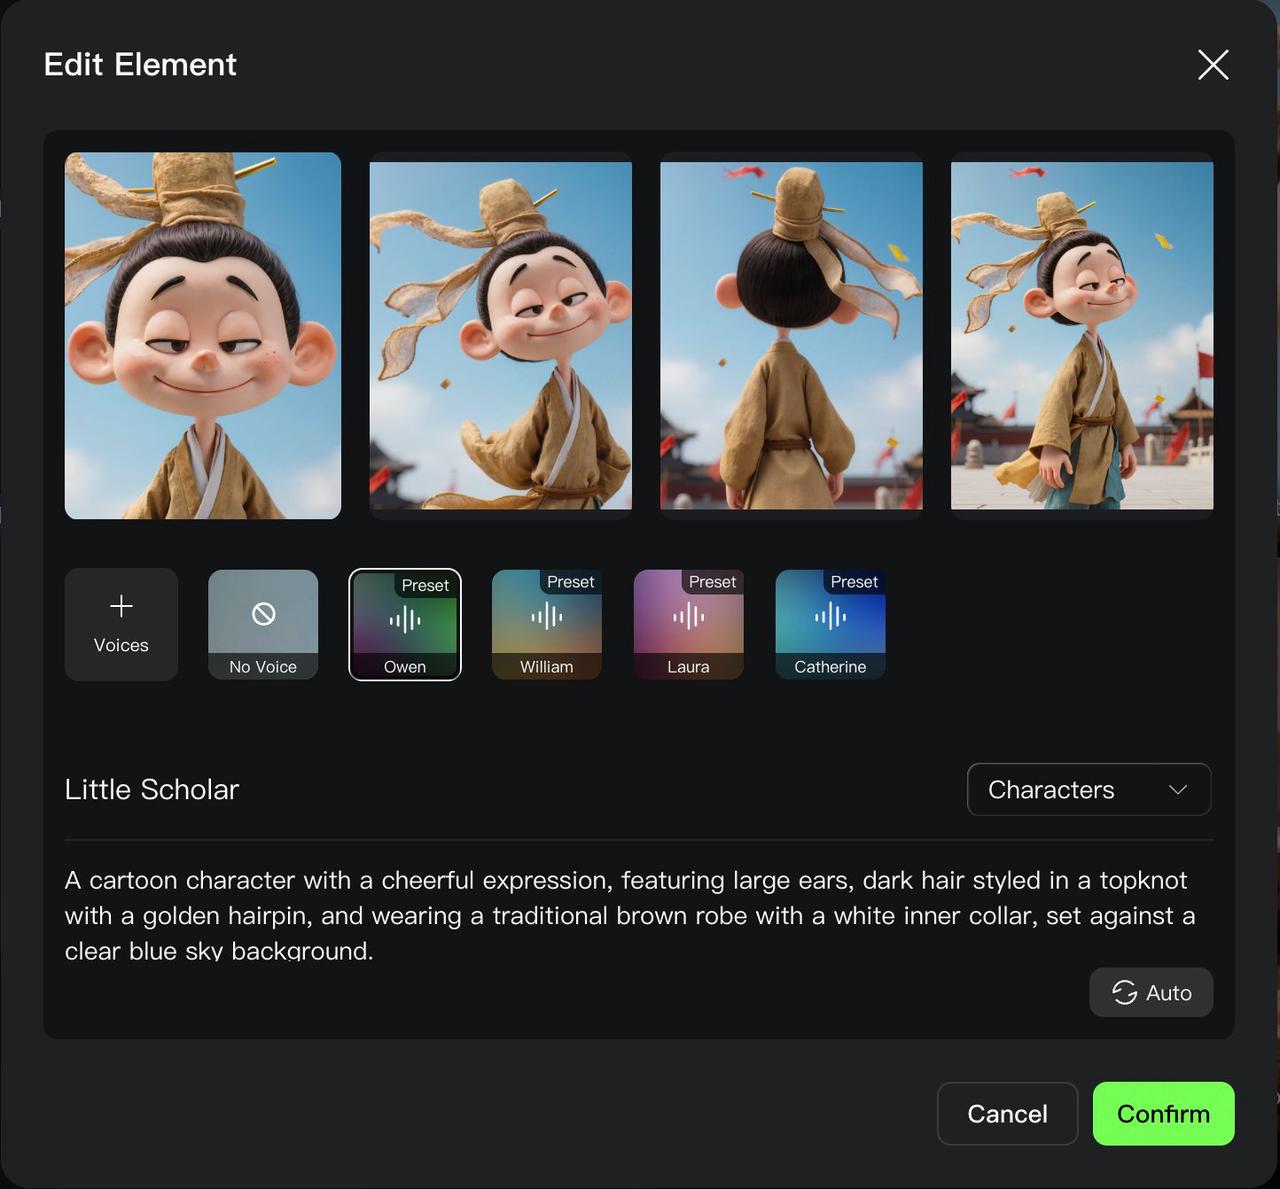
Official character element and voice-binding controls.
In the prompts below, @Maya, @BlueBottle, and @Studio represent elements selected in Kling’s interface. Typing these names without attaching the corresponding assets does not create a reference.
Generate One Simple Shot First
Open the Omni generation workspace, choose the model, and attach the required assets. Begin with five seconds, one camera movement, and no dialogue.
Create a single continuous product shot using @BlueBottle in @Studio.

The bottle stands upright on a clean tabletop. Keep its body shape,
cap, surface color, and label placement consistent with the references.

Camera: a slow, straight push-in from a medium close-up.
Lighting: soft studio light from camera left.
Action: the bottle remains stationary.
Composition: leave clear space above the bottle for text added later.

No cuts, no extra products, and no generated captions.
Inspect the beginning, middle, and end. Check the cap, silhouette, label placement, and contact with the tabletop. If the asset changes, simplify the shot or improve the references before adding new demands.
Add the Presenter and Native Audio
After the bottle shot is acceptable, introduce the presenter and one short spoken line. Kling documents speech generation in several languages, but output quality still depends on reference quality, timing, and prompt clarity.
Create a five-second continuous shot using @Maya, @BlueBottle,
and @Studio.

Maya stands beside the bottle, looks toward the camera, and says:
“Ready when you are.”

Use Maya’s bound voice. Keep the bottle unchanged. Use one static
camera angle. Do not add music, captions, cuts, or additional speech.
Review the audio separately from the picture: confirm that the intended person speaks, the line is complete, and the timing matches the visible performance.
After validating a single shot, reuse its approved references to plan a multi-shot sequence; assign each shot a duration and a distinct visual purpose. Custom storyboard controls support shot-level instructions for duration, framing, camera behavior, and narrative progression.
| Time | Purpose | Visual instruction | Audio instruction |
|---|---|---|---|
| 0–5 seconds | Establish the product | Close-up of the bottle; slow push-in | Quiet room tone |
| 5–10 seconds | Introduce the presenter | Medium shot of Maya beside the bottle; static camera | “Ready when you are.” |
| 10–15 seconds | Finish on the product | Clean hero shot; hold the final composition | Room tone |
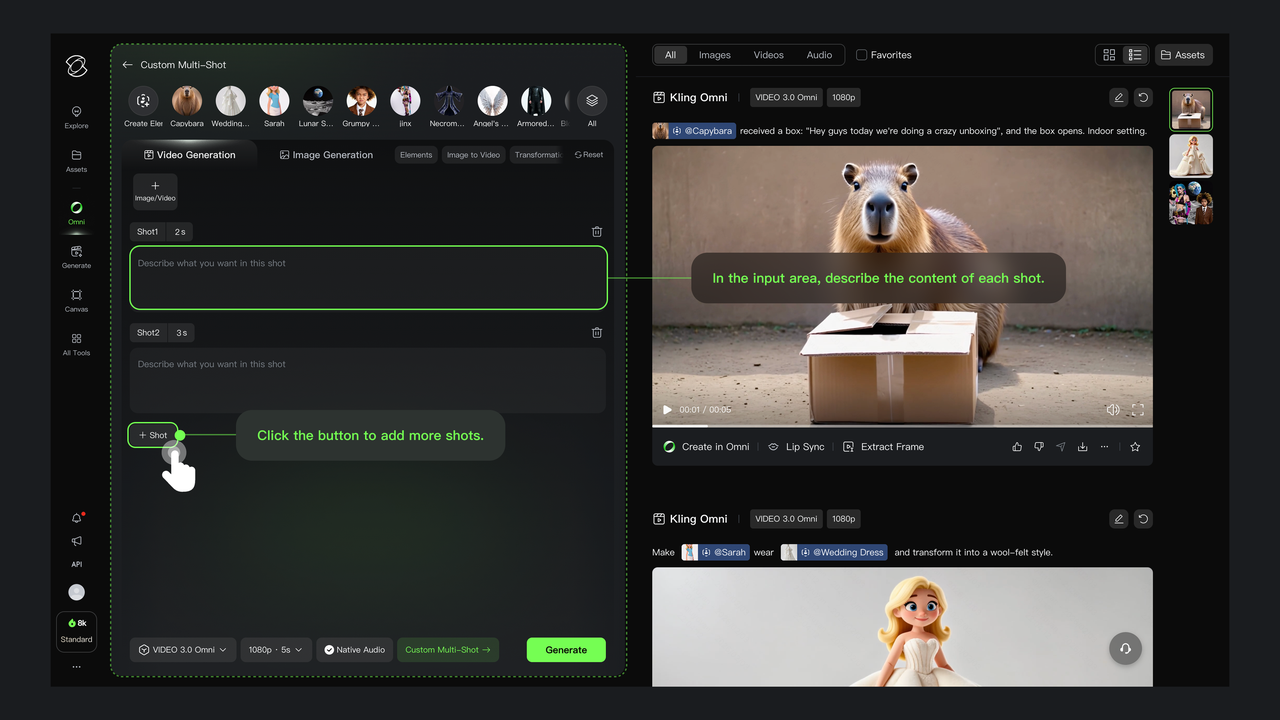
Official custom multi-shot storyboard panel.
Create a three-shot product advertisement using @Maya, @BlueBottle,
and @Studio.

Continuity rules:
Use the same presenter, outfit, bottle, and studio throughout.
Keep the bottle’s shape, cap, color, and label unchanged.
Maintain the same lighting direction.
Use Maya’s bound voice only.
Do not add people, products, captions, or extra dialogue.

Follow the separate shot descriptions and durations.
End on a stable product composition.
Review transitions as closely as individual shots. Compare the last clear product view before each cut with the first clear view after it. Add legal copy, exact prices, subtitles, and brand typography in an editor so that wording remains under direct control.
How to Use Video References for Character Creation and Video Editing
A clip used to create a reusable character is different from source footage supplied for an editing task. The first establishes identity; the second supplies existing motion and composition to transform or preserve. For character creation, use a 3–8-second clip of one character. For video editing, Kling’s official Omni guide permits one 3–10-second source video, up to 200 MB and 2K resolution; check the selected API route’s current limits and test a short clip before scaling production.
Use the uploaded video as the source.

Change only the background to a softly lit studio.
Preserve the presenter’s identity, clothing, actions, and timing.
Preserve the bottle and the original camera movement.
Do not add cuts, gestures, objects, or dialogue.
A controlled edit request is not a guarantee of frame-perfect preservation. Decide separately whether to retain the source audio or generate new sound, then review the output against the original clip.
How to Use the Omni API in CometAPI
For programmatic access, use the dedicated Omni video endpoint. The documented identifier used below is kling-v3-omni.
The examples follow the published API schema; they do not report a live generation test. The selected route documents duration values of “5” and “10” for the relevant modes, so do not assume that a 15-second interface workflow maps to the same request.
Submit a Generation Task
export COMETAPI_KEY="YOUR_COMETAPI_KEY"

curl --fail --silent --show-error \
  --request POST \
  "https://api.cometapi.com/kling/v1/videos/omni-video" \
  --header "Authorization: Bearer ${COMETAPI_KEY}" \
  --header "Content-Type: application/json" \
  --data-raw '{
    "model_name": "kling-v3-omni",
    "prompt": "A blue reusable bottle stands on a clean studio tabletop. One continuous shot with a slow straight push-in. Soft light from camera left. No people, no cuts, no captions.",
    "mode": "std",
    "aspect_ratio": "9:16",
    "duration": "5",
    "sound": "off"
  }'
For a first-frame reference, merge the following fragment into the request and replace the sample URL with an accessible image:
{
  "image_list": [
    {
      "image_url": "https://your-public-host.example/bottle.jpg",
      "type": "first_frame"
    }
  ],
  "prompt": "Starting from <<<image_1>>>, create one continuous slow push-in. Preserve the bottle and studio composition. No cuts or captions."
}
The API’s <<<image_1>>> syntax is different from selected @Element references in the interface. The documented sound values are on and off.
Retrieve the Finished Video
Store the returned data.task_id, then query the Omni task-status route:
TASK_ID="REPLACE_WITH_RETURNED_TASK_ID"

curl --fail --silent --show-error \
  "https://api.cometapi.com/kling/v1/videos/omni-video/${TASK_ID}" \
  --header "Authorization: Bearer ${COMETAPI_KEY}"
The documented states are submitted, processing, succeed, and failed. A creation response with code: 0 means the request was accepted; it does not mean the video is ready. When the task succeeds, obtain the result from data.task_result.videos[0].url.
Use bounded polling with backoff, retain the task ID with the prompt and settings, and inspect the failure message before retrying. A timed-out client request may already have created a billable task.
What Does Kling VIDEO 3.0 Omni Cost?
Use configuration-specific prices rather than a generic “price per video.” The figures below were checked on September 9, 2026 and may change.
Kling’s official VIDEO 3.0 Omni guide lists the following platform credit rates. The CometAPI dollar prices in the next table use different billing units; credits cannot be converted to dollars without the applicable Kling credit purchase rate.
| Omni configuration | Official credits / second | Official credits / 5 seconds | Official credits / 10 seconds |
|---|---|---|---|
| 720p, no video input, native audio off | 6 | 30 | 60 |
| 1080p, no video input, native audio off | 8 | 40 | 80 |
| 1080p, no video input, native audio on | 12 | 60 | 120 |
| 1080p, video input, native audio off | 16 | 80 | 160 |
The official guide does not list a 4K Omni credit rate and marks native audio with video input as unsupported in this pricing table. Confirm current in-product rates before ordering.
| Omni API in CometAPI | 5-second output | 10-second output |
|---|---|---|
| 720p, no video input | $0.336 | $0.672 |
| 1080p, no video input | $0.448 | $0.896 |
| 1080p, native audio | $0.560 | $1.120 |
| 1080p, video input | $0.672 | $1.344 |
| 4K, no video input | $1.680 | $3.360 |
These are separate API configurations. Do not add rows together or infer that every combination of resolution, audio, and video input is available. A 4K price also does not establish which parameter or route enables 4K.
Kling introduced native 4K video after the original launch. Approve content and motion before paying for higher-resolution iterations.
Budget for Accepted Clips
A more useful production measure is:
Cost per accepted clip = total generation spend ÷ accepted clips
Three five-second attempts at the 1080p native-audio rate cost 3 × $0.560 = $1.680. If only one attempt meets the acceptance criteria, its effective generation cost is $1.680. This calculation illustrates budgeting; it is not a measured retry rate.
Keep Kling application credits separate from CometAPI dollar billing. Kling’s credit-cost guide treats duration, resolution, audio, and workflow as independent planning factors.
Troubleshooting: What Should You Change First?
| Problem | First check | Suggested adjustment |
|---|---|---|
| Character changes between shots | Conflicting references or wardrobe descriptions | Reuse one approved element and simplify the shot |
| Product shape or label changes | Reference quality and demanding motion | Add a clearer product view; test a stationary shot |
| Wrong voice or extra speech | Voice binding and conflicting instructions | Keep one speaker and one short line |
| Unwanted cuts | Storyboard settings and scene changes | Test one continuous shot without narrative jumps |
| API rejects the request | Route-specific schema, types, and duration | Return to the documented minimal request |
| Task exists but has no video URL | Generation may still be pending | Query the existing task instead of creating another |
| Higher resolution still looks wrong | The motion or identity problem remains | Revise the scene before increasing output quality |
Change one variable at a time. Record the assets, prompt, settings, output, and reason for rejection so that improvements can be traced to a specific decision.
Final Recommendation
Use Omni when production depends on combining and reusing recognizable assets, not simply because the name suggests a universal upgrade. Begin with one short reference-led shot, approve the character or product, introduce the bound voice, and then build the storyboard. When moving to CometAPI, align the model identifier, duration, reference syntax, and asynchronous task flow with the selected endpoint.
The most useful question is not “How much can I fit into one prompt?” It is “Which uncertainty should I remove before the next generation?”
FAQ
Is Omni always better than the standard model?
No. Preference benchmarks can favor the standard model on some evaluations. Omni is most useful when its broader reference workflow improves asset reuse, continuity, or editing control.
Can every Omni workflow generate 15-second videos?
No. Fifteen seconds is a model-level capability in supported workflows. Individual interfaces and API routes may expose shorter duration options.
Should I begin with native audio and multiple shots?
Usually not. First validate one short visual shot. Add a voice only after identity and product consistency are acceptable, then expand into a storyboard.
Do @Element names work in an API request?
Not automatically. Selected elements in Kling’s interface and an API’s image-reference syntax are different mechanisms. Follow the schema of the route you are calling.
How should I estimate a production budget?
Track total generation spend and divide it by accepted clips. Include rejected attempts, higher-resolution reruns, storage, and post-production in the working estimate.